Apply Now
Step 1: Register Sevi account
Download Sevi app
Opening an account with Sevi is very easy. Please follow the following to create your Sevi account within a few minutes:
NOTE: Sevi Registration is exclusively through the Android App.
To get the app, proceed to download the app from the Play store, and search for Sevi. Tap Install, and you’ll have the App installed on your phone.
The first time you launch the Sevi App you will be provided with a few introductory details about Sevi. Click Next

With this done, you will be directed to begin the registration process. Follow the onscreen instructions and provide us with the necessary information.
Enter your phone number
Select your country from the dropdown menu, by clicking the flag. Then fill out your phone number.
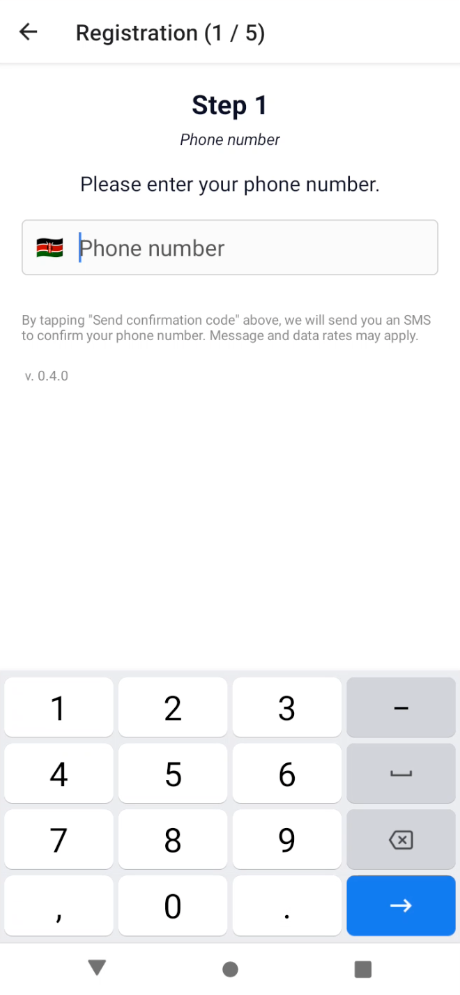
NOTE: Kindly confirm your country code before proceeding
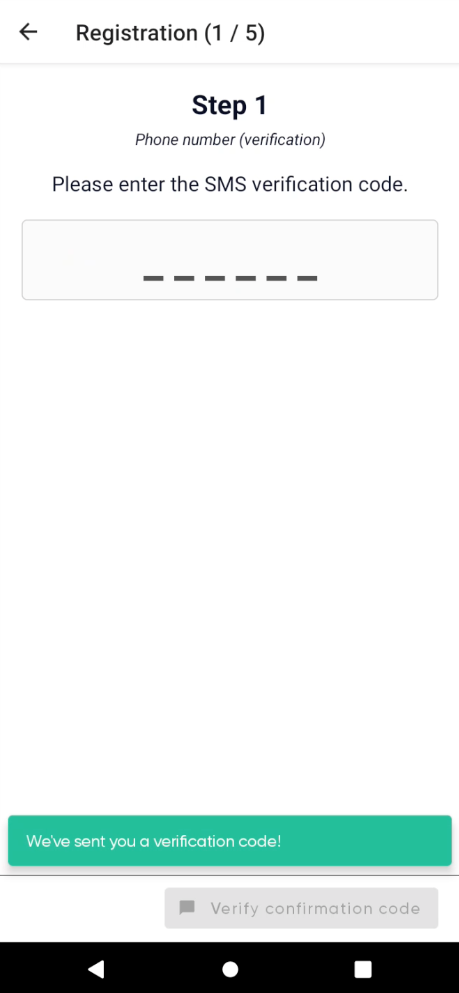
Phone Number Verification
A text message containing a One-Time-Password (OTP) will be sent to your text inbox. Enter the OTP as the verification code and verify your confirmation code by clicking Verify confirmation code.
Take a Selfie Picture
Because Sevi provides a financial service we are obliged by law to perform a 'know your customer procedure'. No worries, it won't take long and you can do it from the convenience of your own smartphone. Your personal data is stored savely and will not be shared or sold. For more information see our Privacy Policy
Make sure your face is within the oval on the screen. Follow the instructions, by looking to the left and the right and smile. This way we protect your account and no one else but you can access it.
Take a picture of your ID card
Please take a photo of your ID card front side.
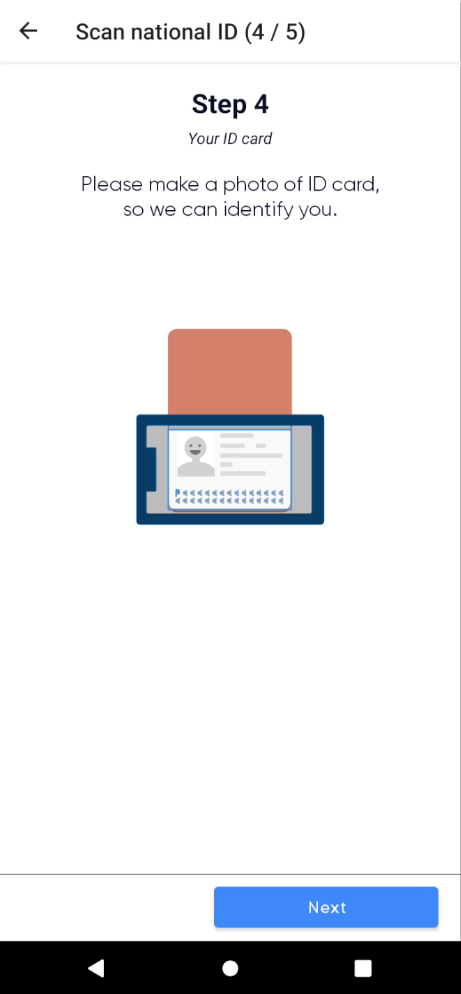
NOTE: Take a picture of the ID in a well-lit environment. Ensure all four corners of the document are visible, and there are no reflections (if your phone’s flashlight is on, be sure to switch it off). Clean the lens, hold the phone steady, and align the camera for your ID to fit the frame. Proceed to take the picture and ensure that the information on it is legible.
Create your Sevi App PIN
After successfully going through the KYC process, the last step is to create a four-digit PIN for your Sevi App.
This PIN will be used to log in to your Sevi App. Kindly memorize it or write it down on a piece of paper or save it on your mobile device.
Never share your PIN with others, this will give them access to your Sevi account. Sevi and our support team will never ask for your PIN.
Step 2: Register your company
Create company account
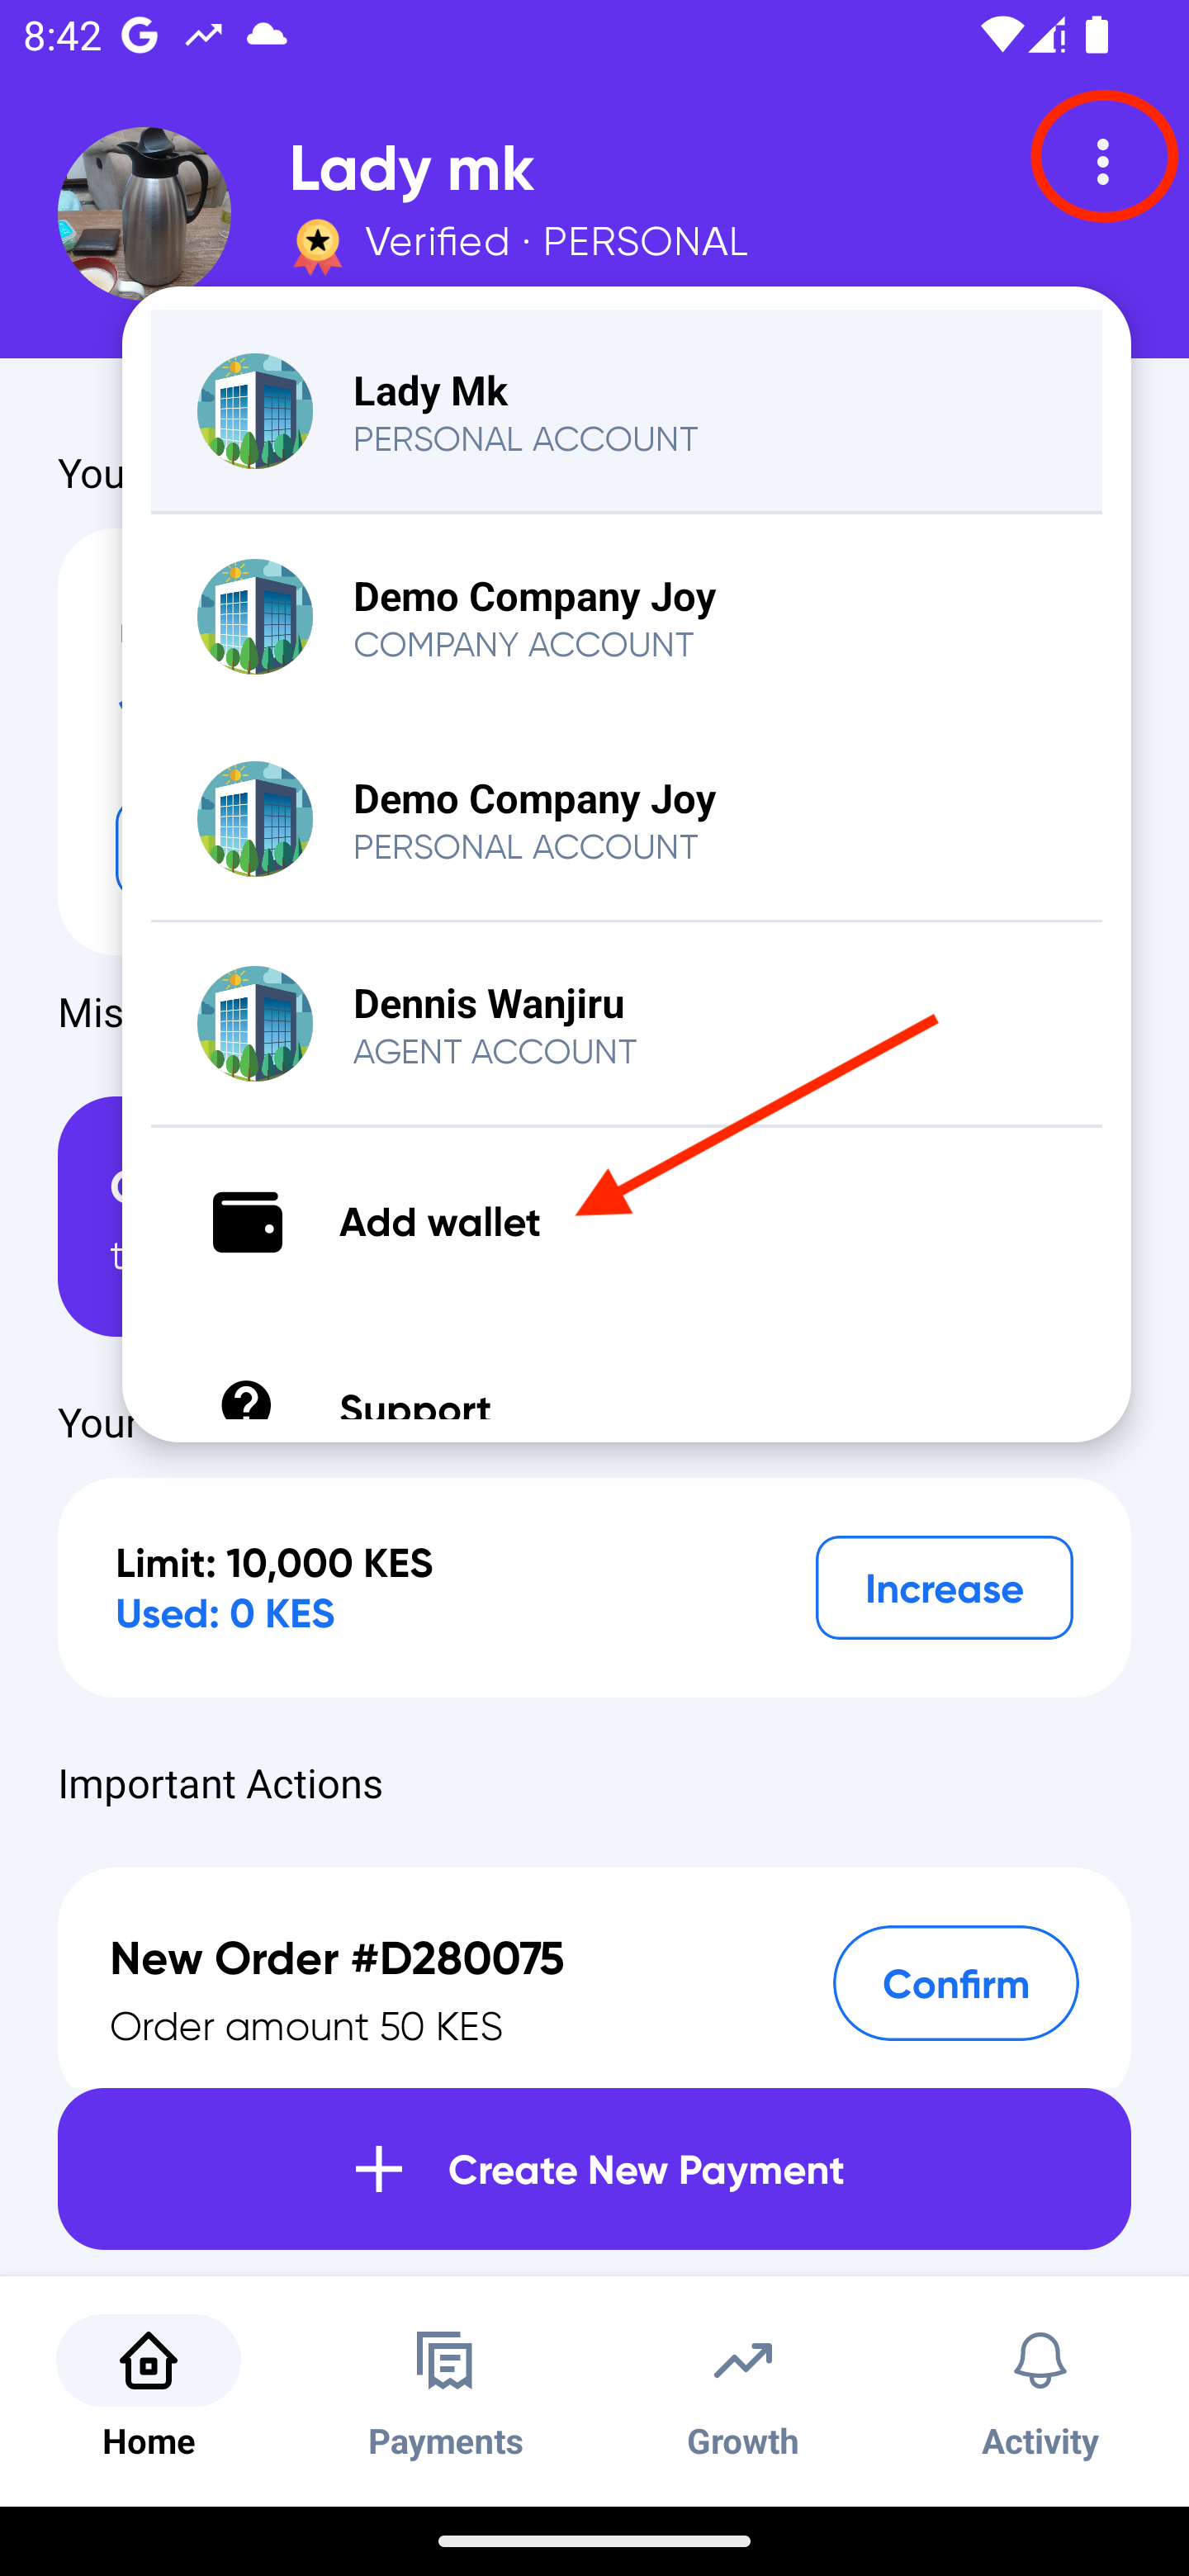
To register your company, you first need to create a company account.
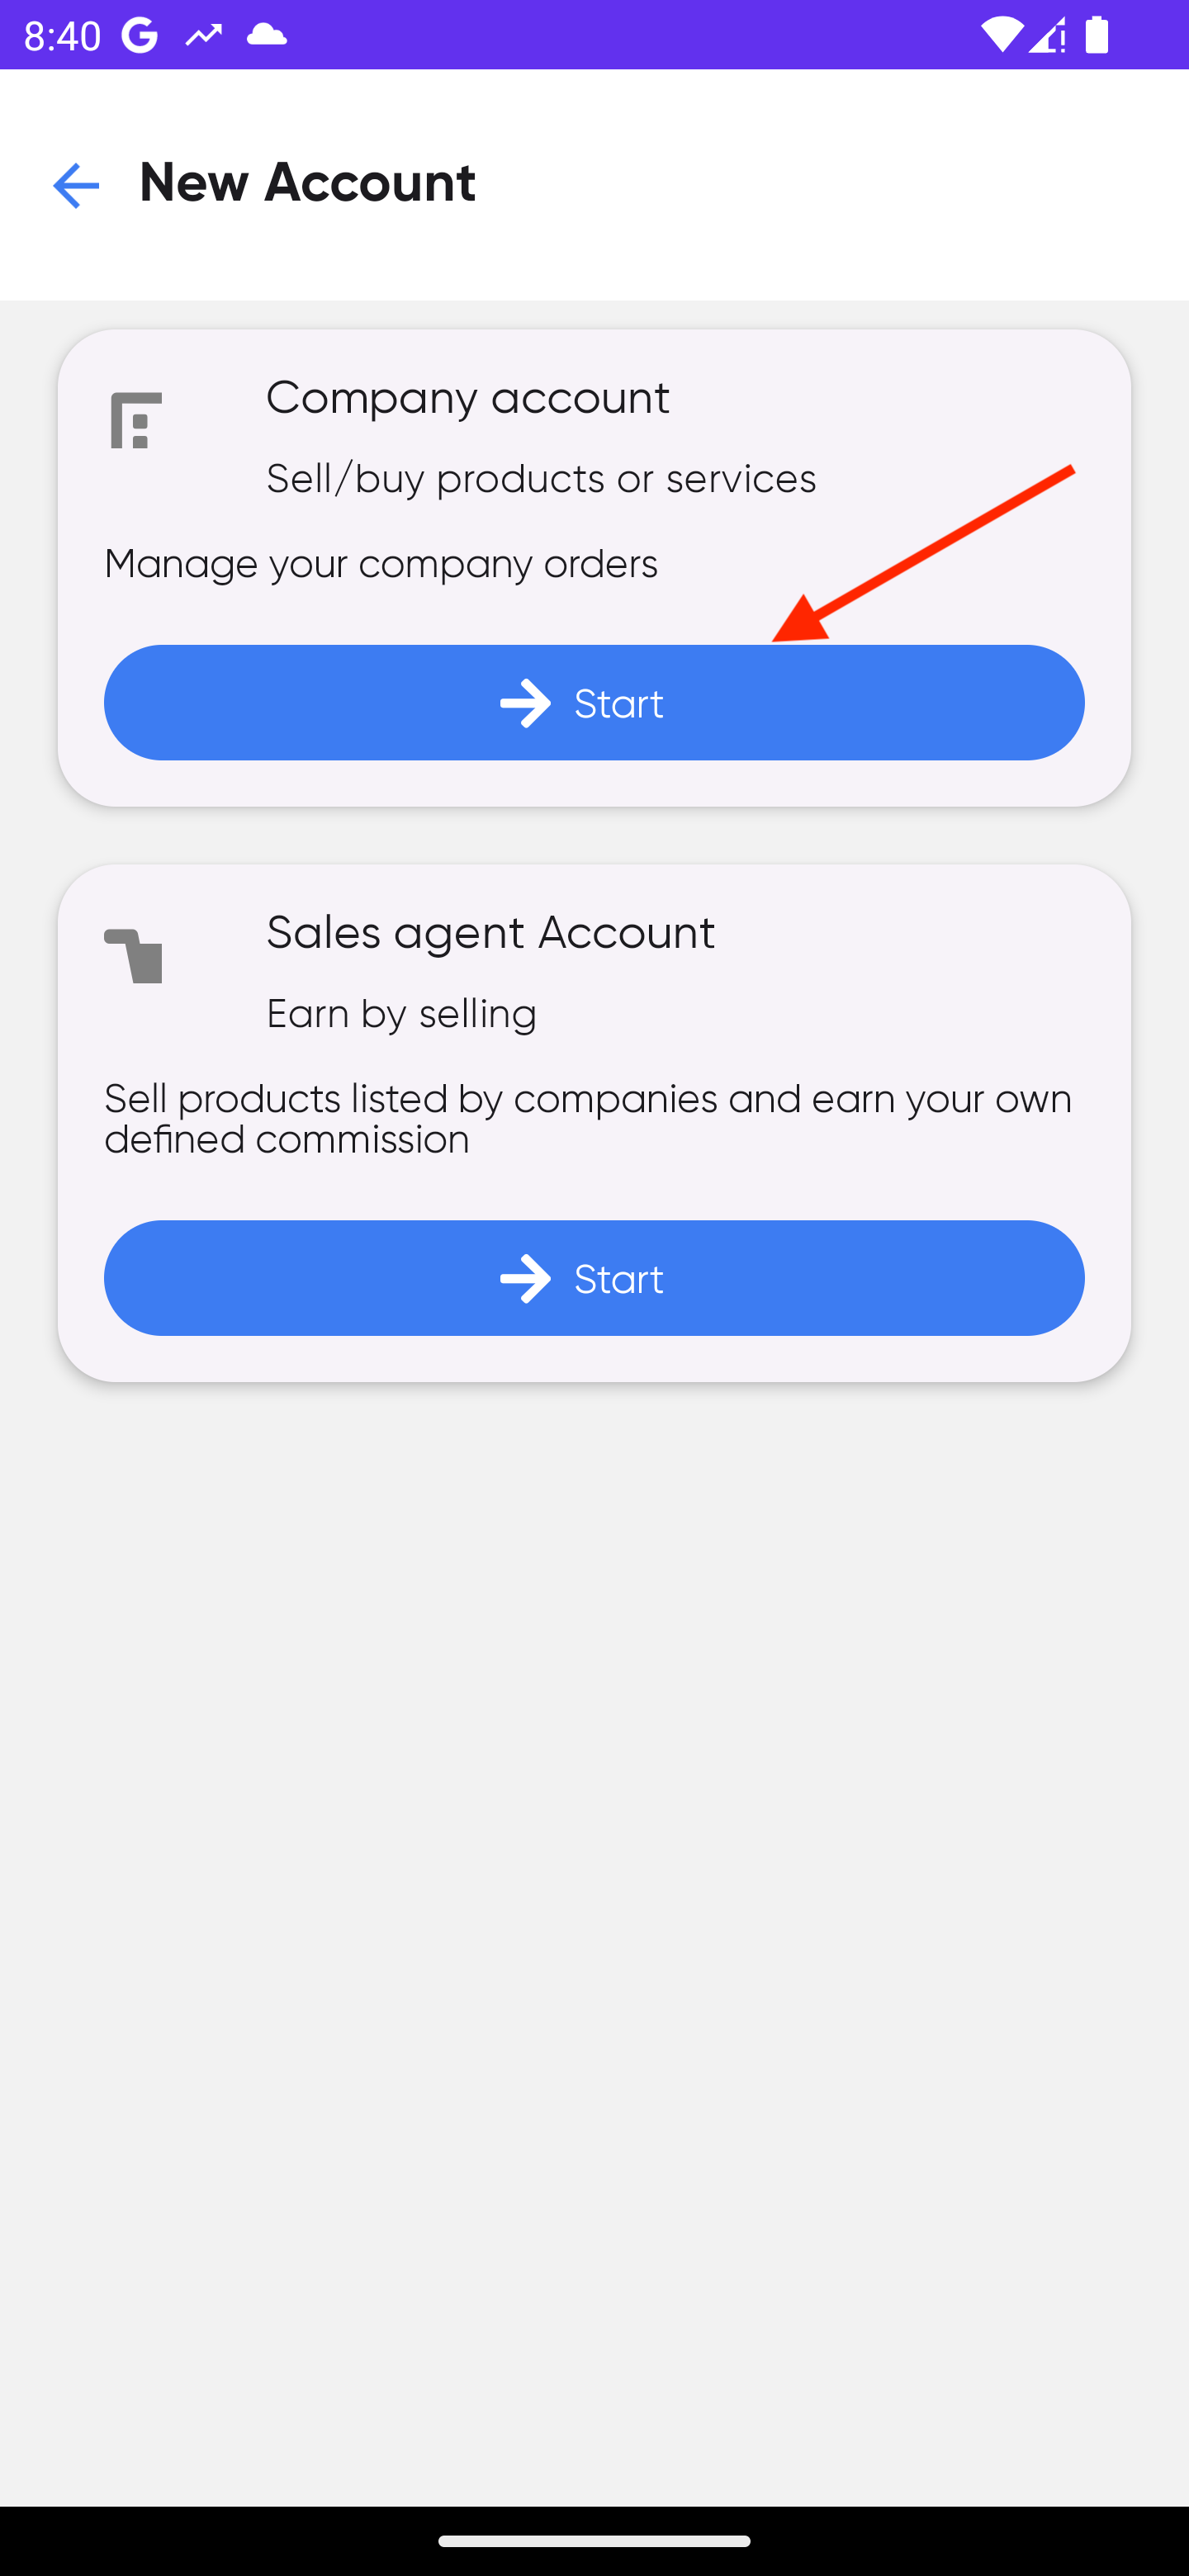
Tap on the 3 dots highlighted below, you will now see the button Add wallet. Press Add new wallet and then press Start on the Company account option. Follow the three-step process:
- Select currency
- Select
Yesif you want to become a verified Sevi Seller - Add your KRA pin. NB: this should be the KRA pin of your company.
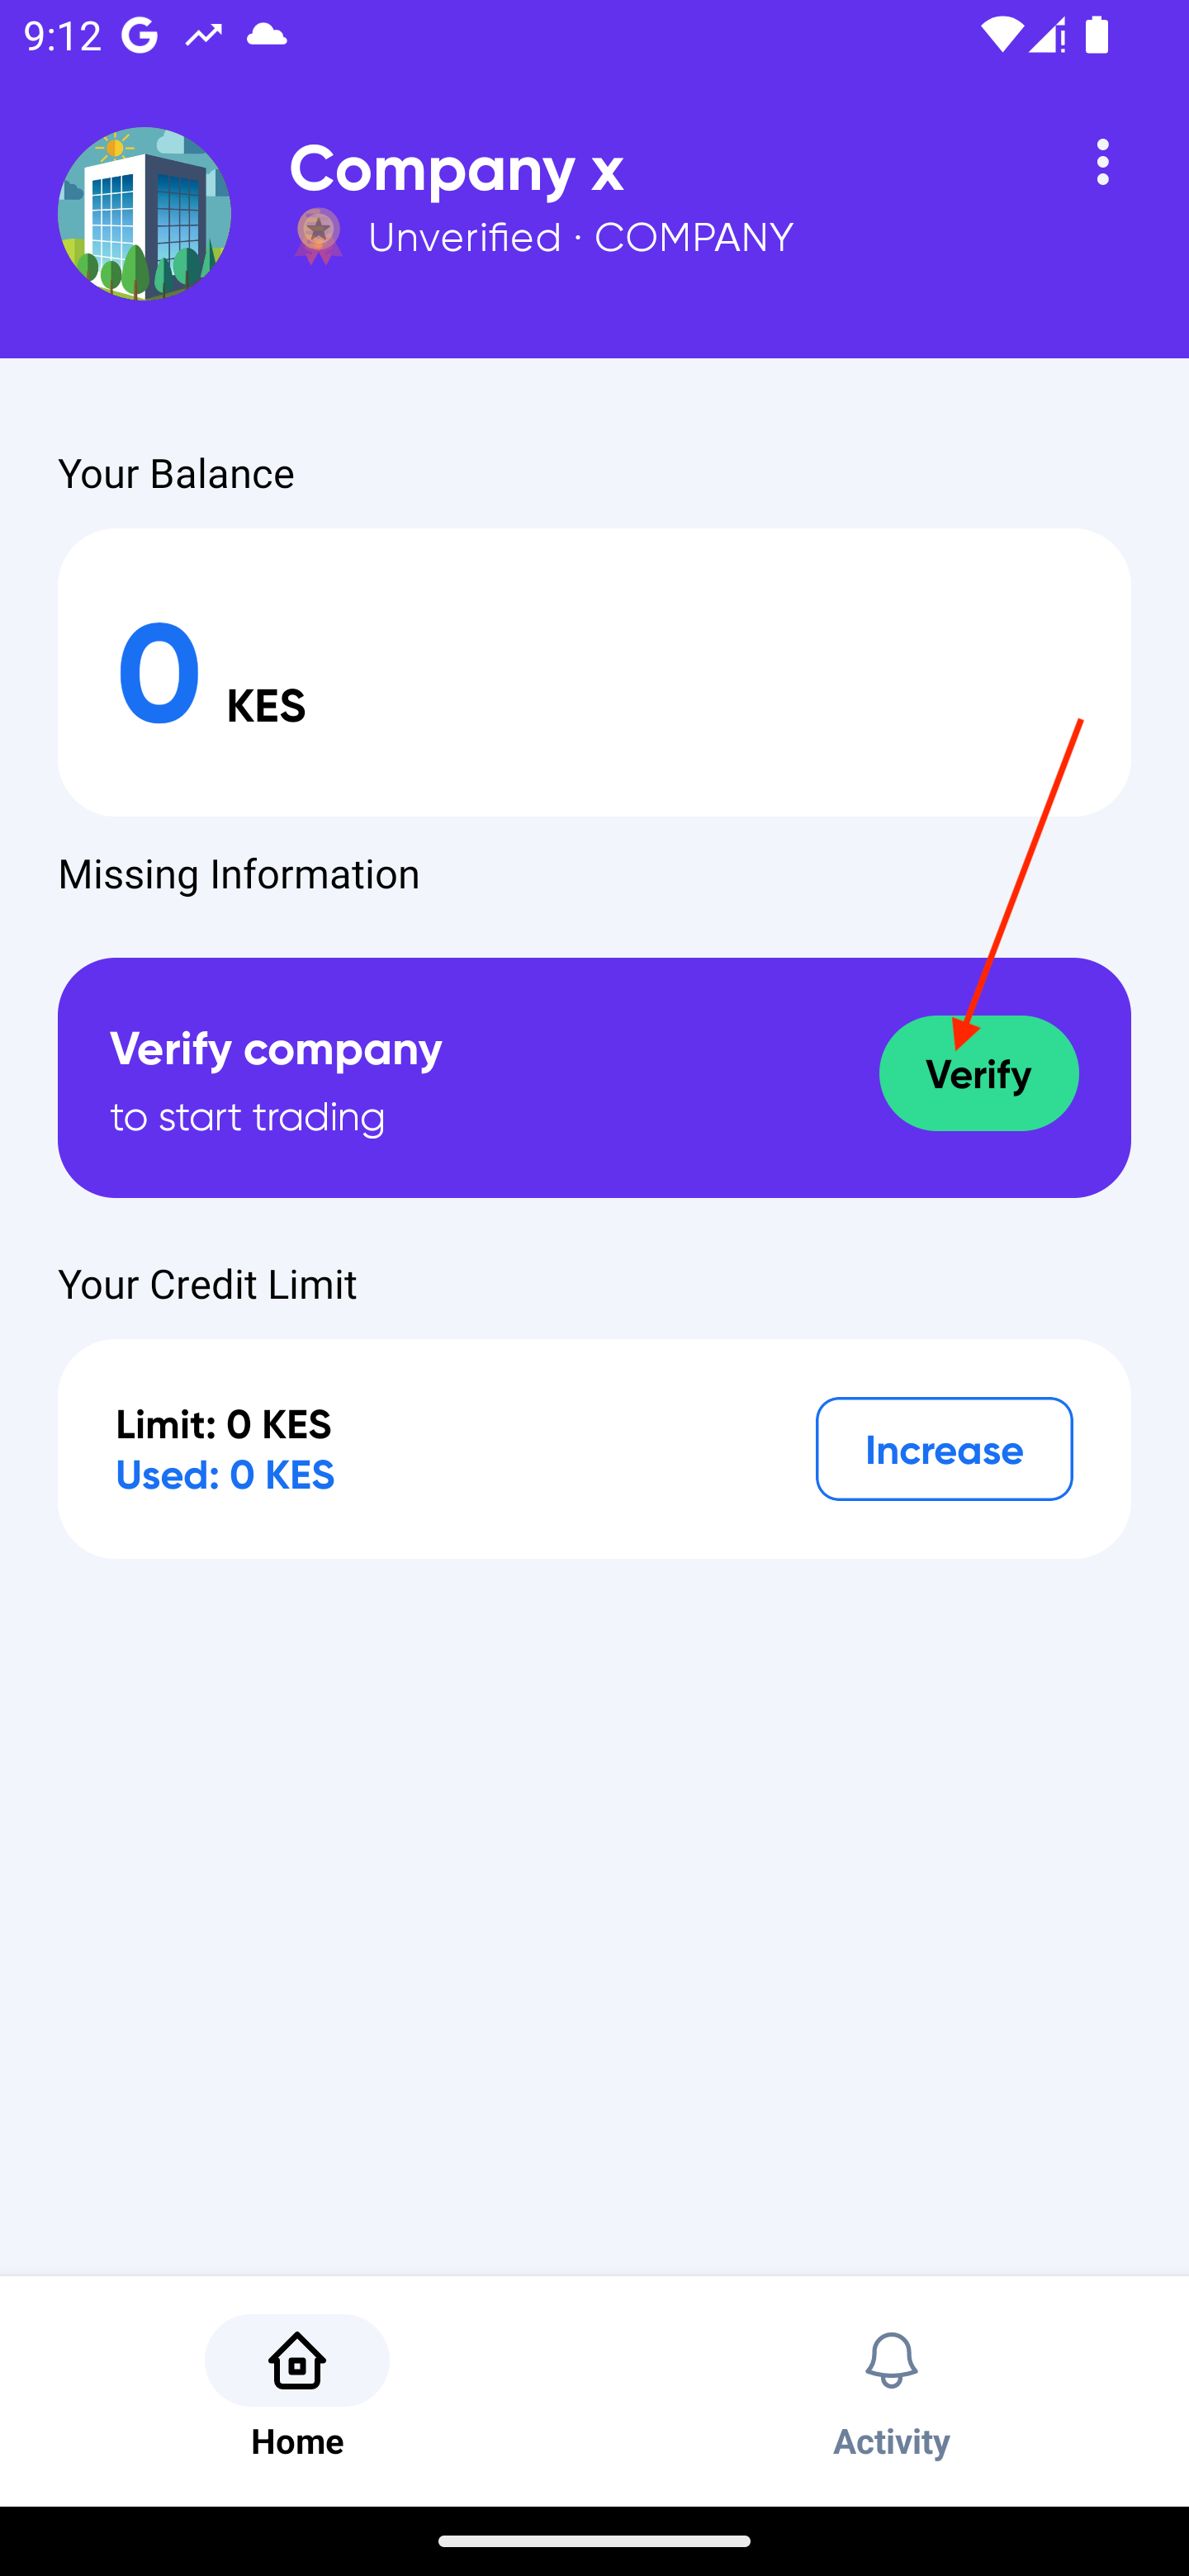
You have now created a company account.
Get Verified
To become a verified Sevi Seller, tap on Verify.
Follow the stepper to set:
- Your location, this is the location of your company.
- Bank account, this is the account you can withdraw your money to from your Sevi company account.
- Upload your company documents:
- Certificate of incorporation
- Signed commercial framework
- Signed commercial agreement
- KRA PIN certificate
- CR-12
ALL DONE!!
You have now applied to become a verified Sevi Seller. Our due diligence team will review your application and schedule a company visit to verify your information.
Once the due diligence process is successfully done, we will inform you, so you can start using the Order now, Pay later service for your customers.