Step 1: Register a Sevi Account
Opening a Sevi account is quick and easy. Just follow these steps:
1. Download the Sevi App
Sevi registration is only available on Android.
- Download the app from the Google Play Store.
- Tap Install, then open the app.
2. Verify Your Phone Number
- Enter your phone number (use your main active line, Safaricom).
- Tap Continue to send a Verification Code.
You’ll receive a One-Time Password (OTP) by SMS. Enter the OTP to confirm your number.


If the code doesn’t arrive by SMS, tap Resend Code to get it via WhatsApp, Phone Call or Change Phone Number.
3. Add Your Business Details
After verifying your phone number, complete the onboarding form with the 6-steps:
- Business Name → The name your shop is known by.
- Seller Account → Select your seller/supplier who will fullfill the orders.
- Access PIN → Create a 4-digit PIN for logging into Sevi.
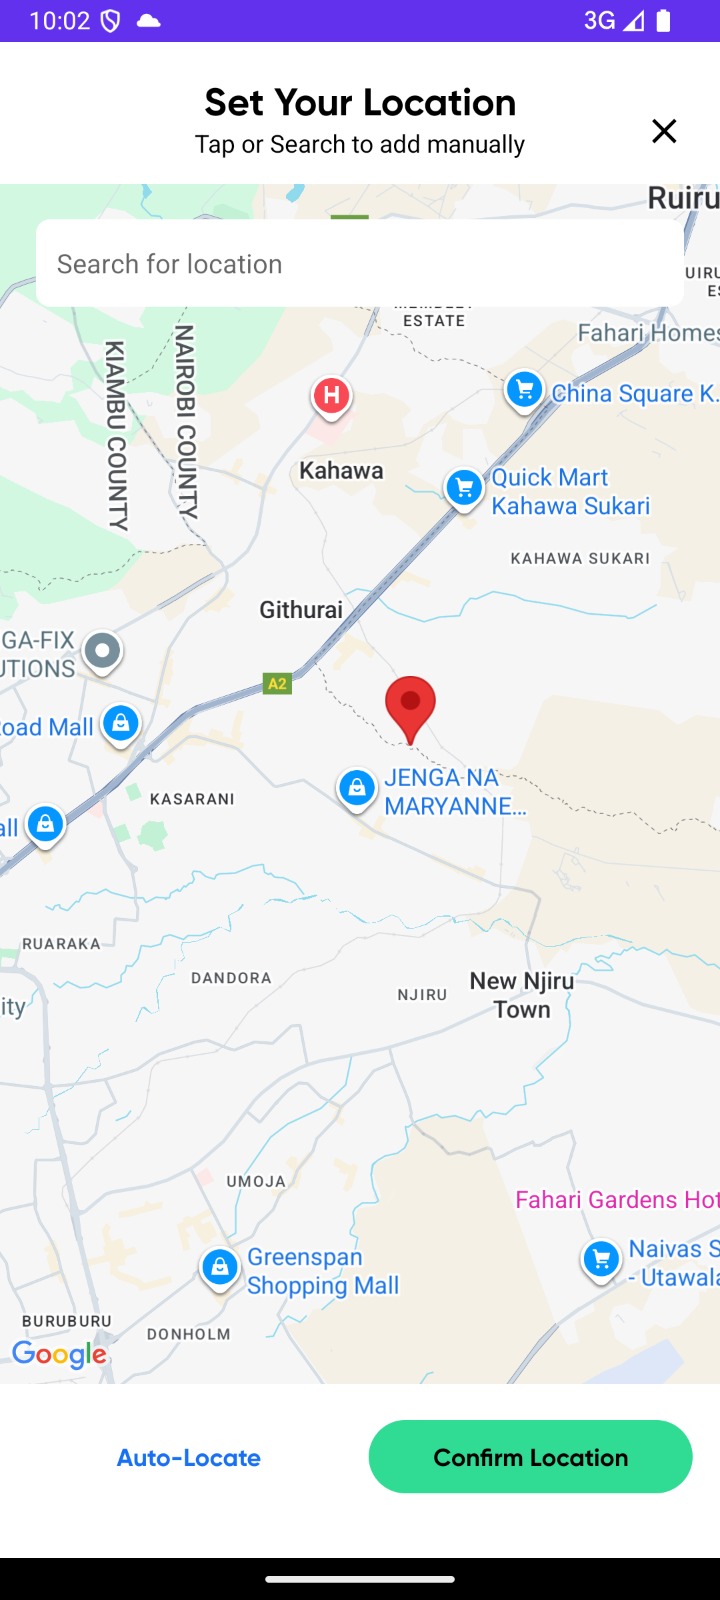
- Business Location → Pin your shop location on the map.
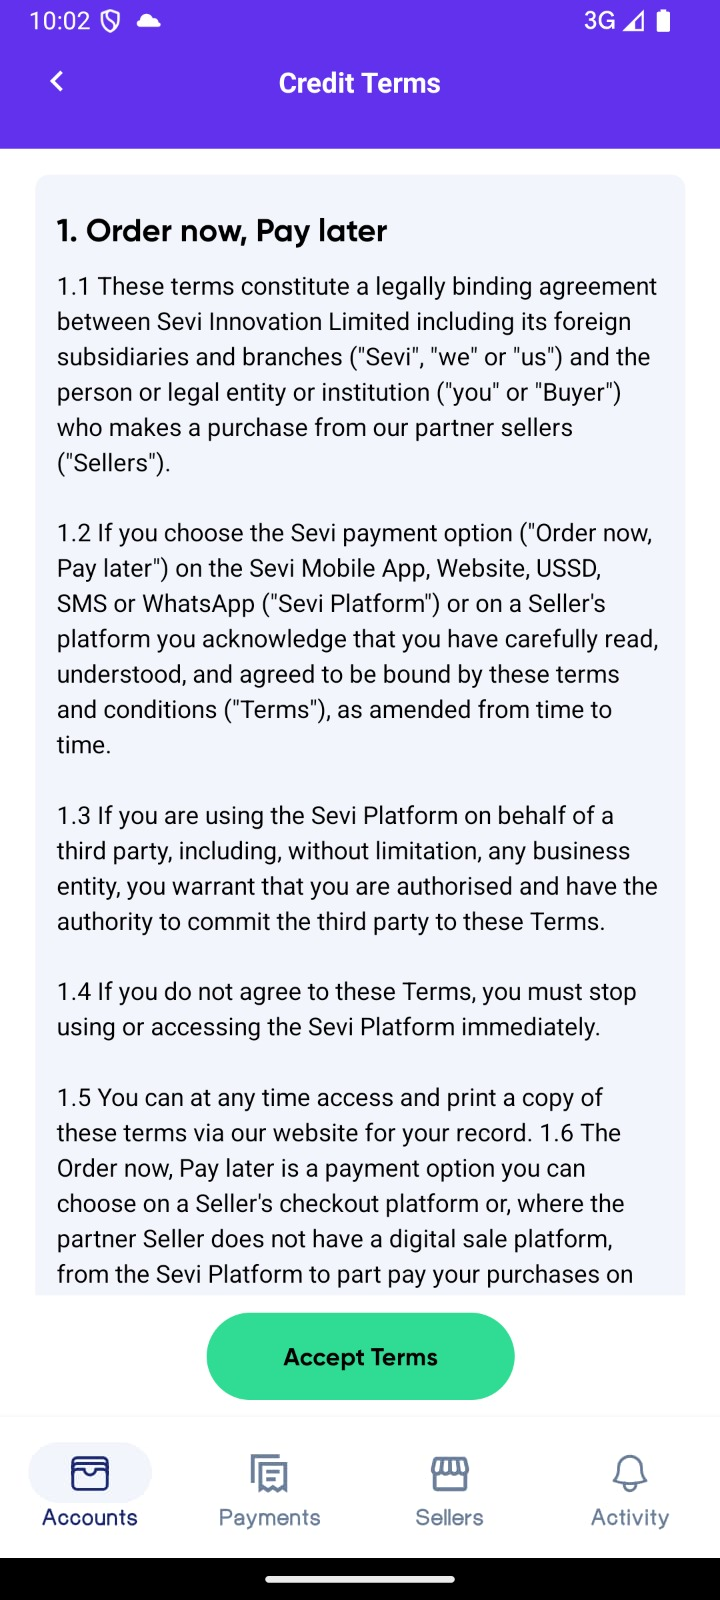
- Credit Terms → Read and agree to Sevi’s terms.

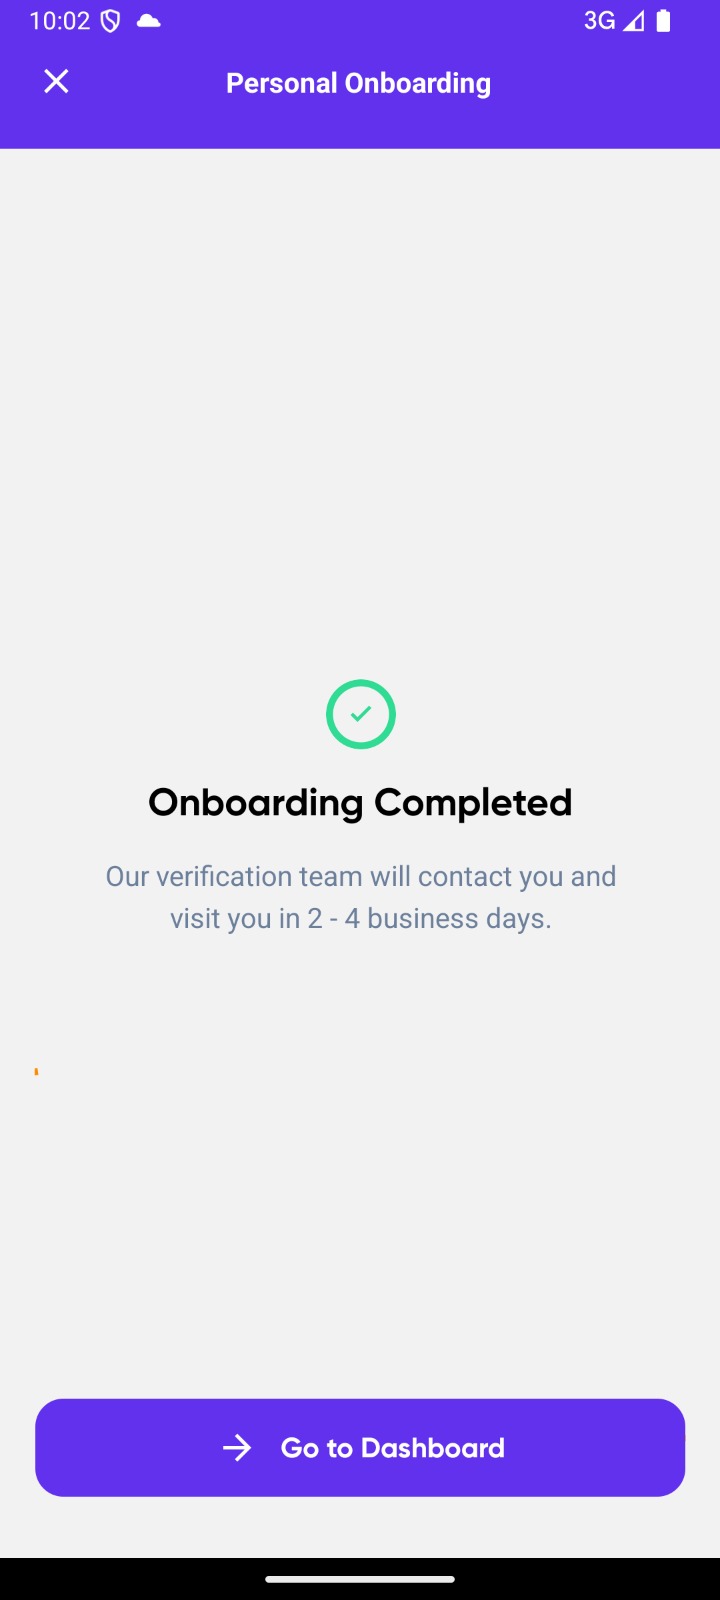
📍 Once you set your location and agree to the terms, your account will move to Waiting on Verification status.
Memorize your Access PIN or store it securely. You’ll need it every time you log in.
Never share your PIN with anyone. Sevi will never ask for it.
4. ✅ All Done (Next Steps)
Your Sevi personal account has now been created.

What happens next:
- Our verification team will visit your business to complete verification.
- During the visit, they’ll capture:
- Your National ID
- Your Face ID photo
- Your 6-month full M-Pesa statement
- After verification, you’ll receive a credit limit that lets you Order Now, Pay Later with verified suppliers.
Have your National ID and Full last 6 months’ M-Pesa statement ready for the verification visit. Keep your line active incase you will be contacted.