Users
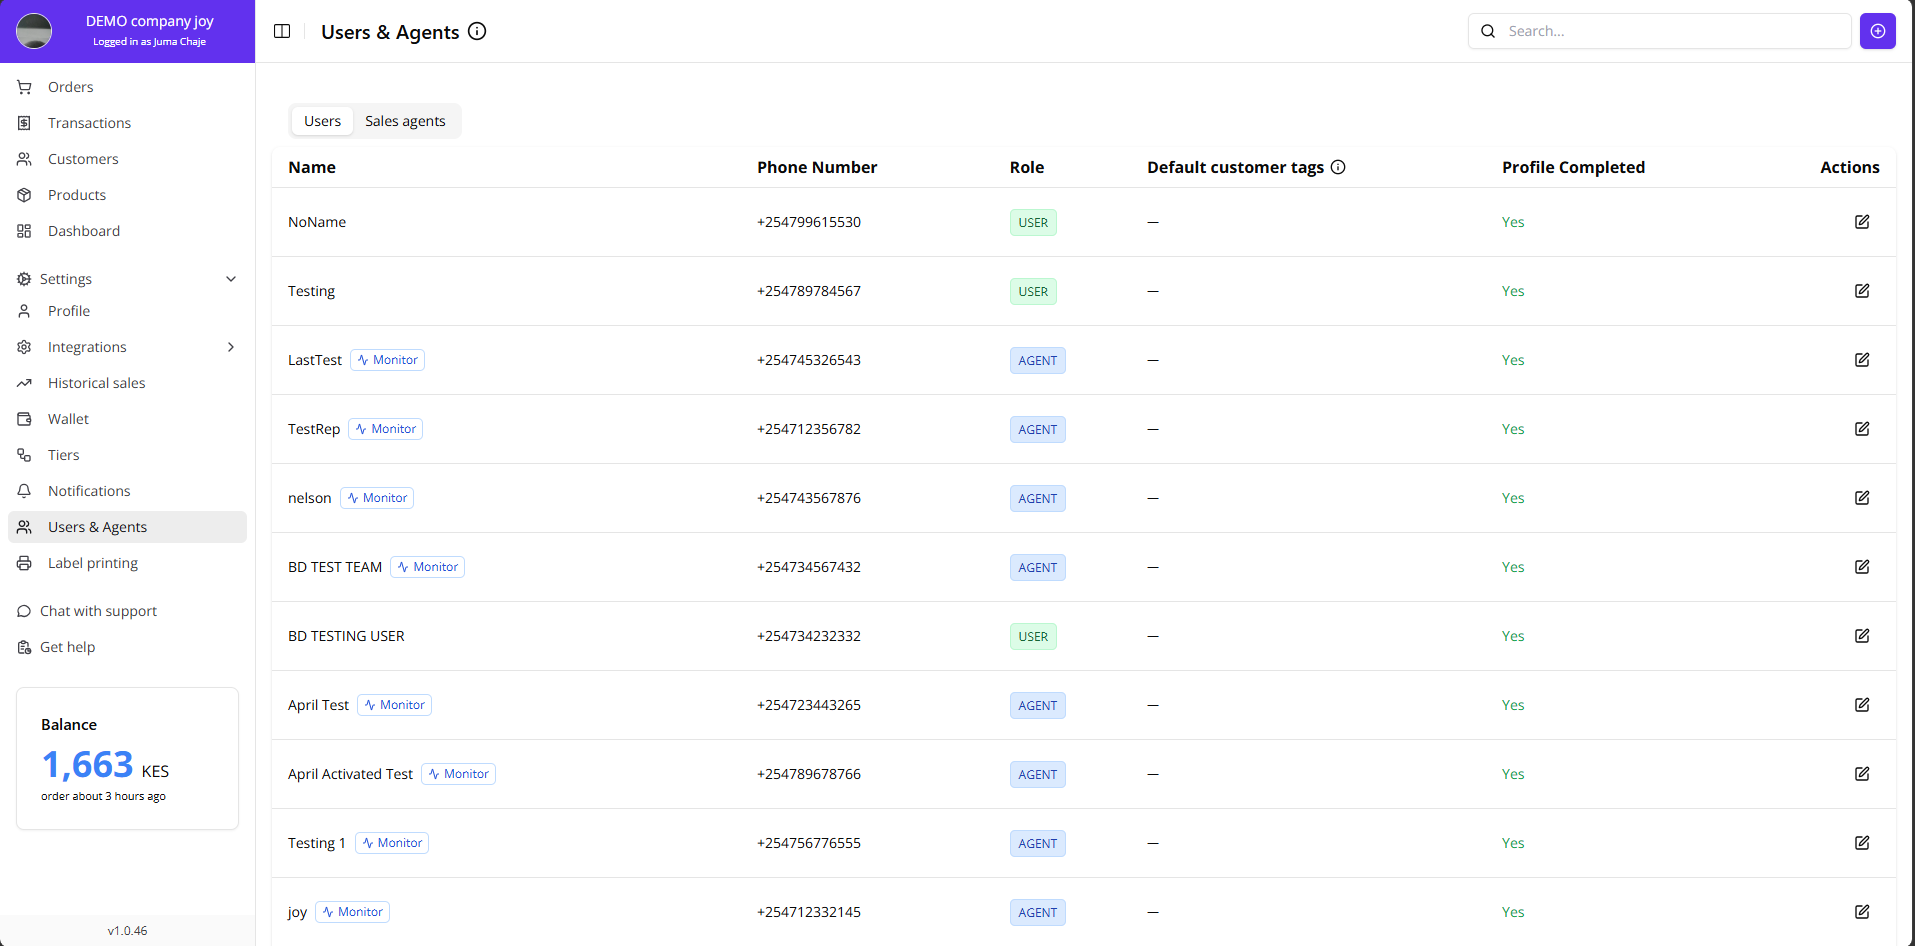
The Users page (Settings → Users) lists everyone who has access to your company account, with their role and the customer tags they hand out automatically.
Roles
| Role | What it can do |
|---|---|
| Admin | Full control: manage settings, invite and remove users, change roles, assign default customer tags. |
| User | Day-to-day work: create orders, payment requests and customers; view transactions. |
| Agent | A sales rep or field agent acting on behalf of your business. Can create customers and orders for you, without access to settings. |
Inviting a user
- Click Invite user (top-right) the
+button. - Enter the phone number, choose a role and — optionally — pick the default customer tags for this person.
- Confirm. The person receives an invitation to join your account.
To change a role or the default tags later, open the ⋮ action menu on the user's row and choose Update role & tags.
Default customer tags
Every member of your account — whatever their role (admin, user or agent) — can carry one or more default customer tags. These are the same tags you already use on the Customers page (for example a route name, a region, or a rep's name).
How the mechanism works
- An admin assigns tags to a team member on the Users page (or when inviting them).
- From then on, every customer that member creates or invites is automatically tagged with all of those tags — no manual tagging needed.
- The tags appear on the customer immediately on the Customers page, exactly as if they had been added by hand.
What it does not do:
- It never changes customers that already exist. Assigning a tag to a member later does not re-tag their earlier customers, and removing a tag from a member does not remove it from customers who already have it.
- It only applies to customers the member creates for your account. Tags belong to the account they were created on and cannot be shared across accounts.
- The customer can still be edited freely afterwards — tags added automatically can be removed or complemented on the Customers page like any other tag.
Typical uses
- Routes — tag each field agent with their route so new customers are grouped by delivery route automatically.
- Sales reps — tag each rep with their own name so you can see who onboarded which customers and follow up per rep.
- Regions or branches — tag the members of each branch so every customer they onboard is attributed to that branch.
Managing tags
- You can pick any tag that already exists on your account, or create a new one on the spot: type a name in the "New tag name" box under the tag chips and press Create. The tag gets a colour automatically, is selected for the member straight away and is available on the Customers page like any other tag.
- Tags are renamed, recoloured or deleted on the Customers page (the "+" beneath a customer's tags).
- The Default customer tags column on the Users page shows what each member currently hands out. Hover the ⓘ icon next to the column title for a short reminder of this behaviour.
Finding orders and transactions by tag
Because tags end up on customers, you can use them to slice your Orders, Transactions and Dashboard pages:
- On Orders, open Add filter and pick one or more Customer tags. Only orders of customers carrying all selected tags are shown.
- On Transactions, the same Customer tags filter shows only transactions that belong to an order of such a customer (wallet top-ups, withdrawals and other transactions without an order are hidden while a tag filter is active).
- On the Dashboard, the same filter (together with period, order status and payment status) narrows every card and chart to the tagged customers and their orders — handy for a per-rep or per-route view.
Active tag filters appear as Tag: <name> chips above the table; click the × on a chip to remove it, or Clear all to reset every filter. Combining tags narrows the result (a customer must have every selected tag), and tag filters combine with the other filters (status, date range, search) as usual.